Tuesday, January 25, 2011

Cricut Circle Blog January Monthly Challenge: Scraplift a Circle Blog Project

"It’s been three months since we first began the Cricut Circle Blog. We LOVE bringing you new projects and hope that you enjoy reading the blog each day. It is also our hope that we have inspired you to try something new in your crafting. For this month’s challenge we would like to see you scraplift one of the projects you have seen us present here on the blog. It can be anything! And feel free to add your own creative twist to the project. Project must be newly created for this challenge and should include the following elements to qualify.
  • Use 2 or more Cricut Cuts on the project.
  • Use a project you have seen on the Cricut Circle Blog as inspiration for your project.
  • Use products from at least two of our Sponsor" 
For my scraplift project, I chose Lynn Ghahay's wine charms posted on November 27th.


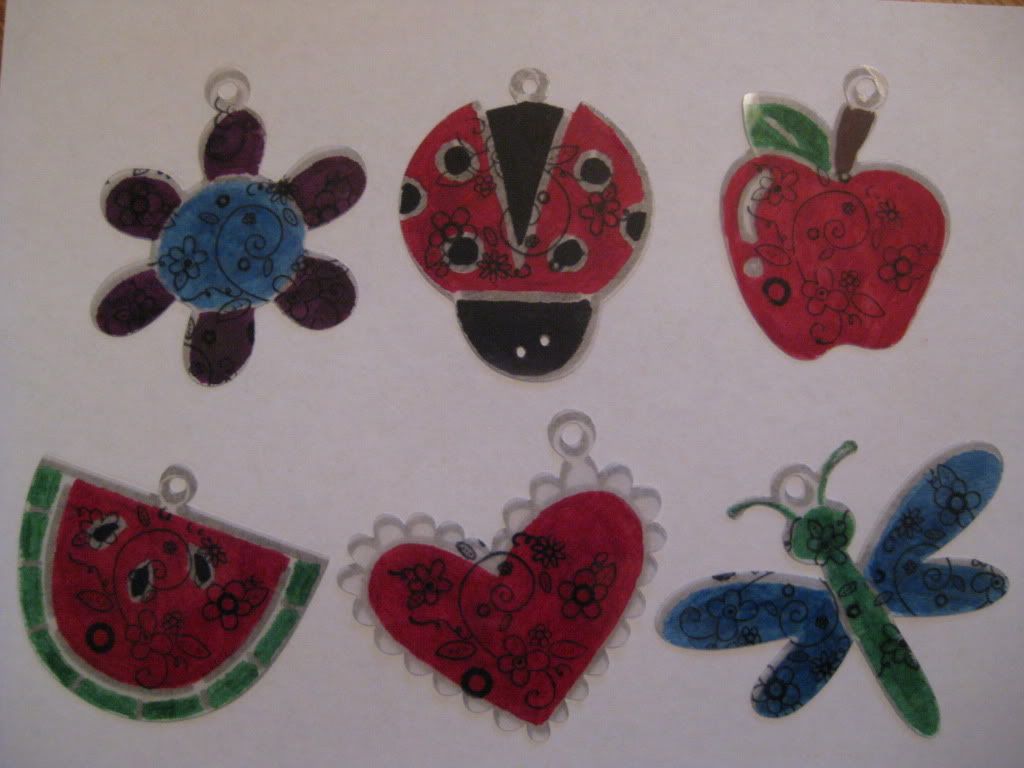
It has been a while since I've played with Shrinky Dinks so I thought this would be a fun project.  I chose the following cuts from Doodlecharms:  Lady bug and Watermelon, 2 1/2" and Apple, Flower, Heart and Dragonfly, 3".  I used the Cricut markers to draw the cuts first then I cut them out.

Using American Crafts Slick Writers I colored the cuts.  These markers are for writing on plastics.  This marker pack was limited to five colors:  Black, Blue, Red, Green and Purple.  I used a brown Cricut Marker for the apple stem.

To enhance the design, I used Imaginisce's "Flower" stamp from their Snag 'em Stamps and black Staz On ink, stamping on the same side I had previously colored.


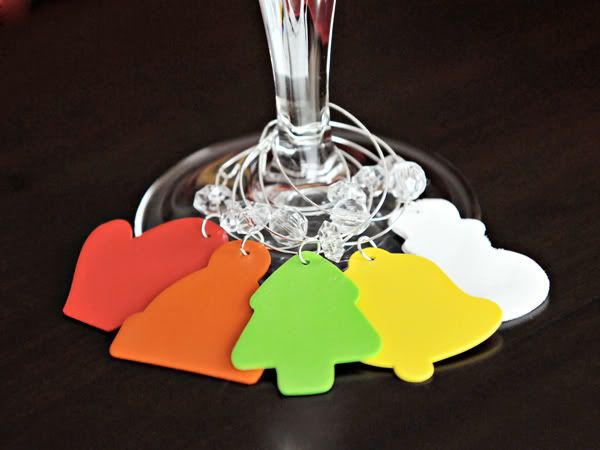
After baking, charms were assembled using earring rings and plastic beads.


A few close-ups


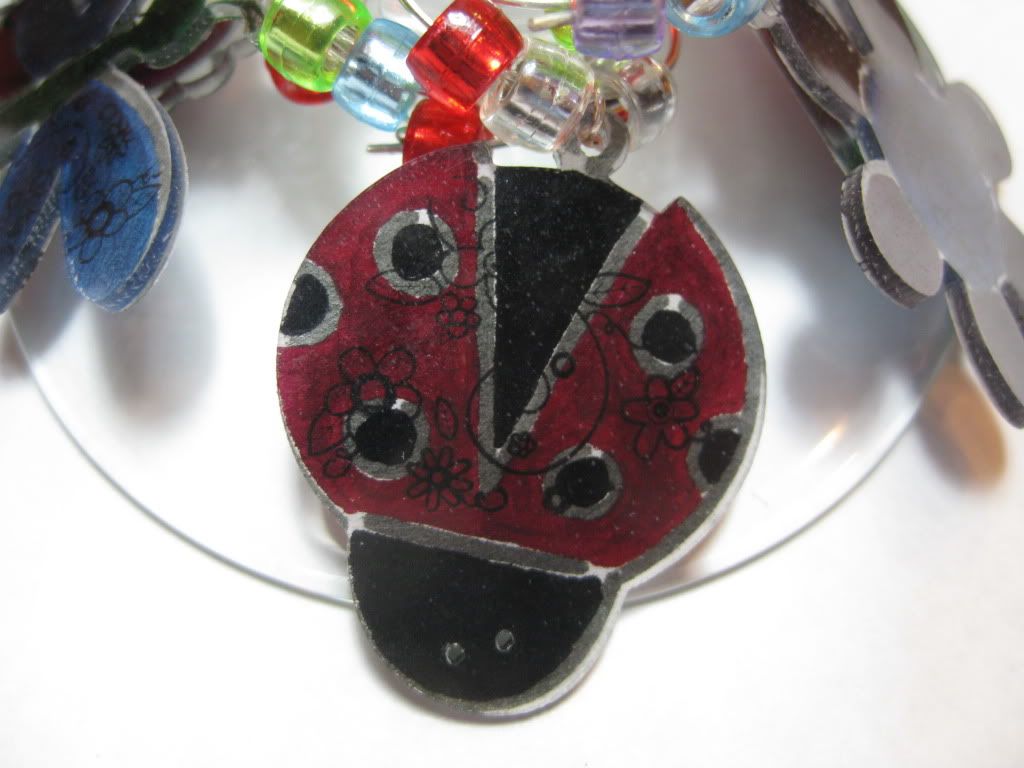
They are a little darker than I would have liked but overall I am happy with how they turned out.  I love the stamped image on the plastic.  This definitely was a fun project and I'll be playing more with Shrinky Dinks.

Sunday, January 23, 2011

Cricut Circle Blog Weekly Challenge #17: B.A.B.Y. Challenge

"At first glance, you may think this challenge is all about babies . . . but look again! We are usually the memory keepers in our households, but how often do you take the opportunity to step out from behind the camera and record something about yourself? This week we challenge you to create a scrapbook layout all about YOU. Your page must include the following:
  • (B) = Brads
  • (A) = Aqua
  • (B) = Butterfly
  • (Y) = You as the Subject
Project must be newly created for this challenge and must include atleast 2 different cuts from any Cricut cartridge to qualify."

At first I was not going to do this challenge as it is my least favorite subject to scrap. But as I look at pictures of my grandparents and great grandparents I find myself wondering what they were like when they were younger. So for future generations here it is.


I followed a PageMaps sketch from a weekend challenge for inspiration. Paper is from Basic Grey. I used the following Cricut Cartridges: Wall Decor and More - Butterflies, 2 1/2"; Just Because Cards - Scalloped Border, welded and stretched in Design Studio. Metal brad flowers were added to the journaling.

Monday, January 17, 2011

Cricut Circle Blog Weekly Challenge #16: Cute as a Button Sketch

"Babies are definitely 'cute as a button' with their sweet little faces and tiny features. In honor of our Baby Theme, this week we challenge you to create a SCRAPBOOK PAGE or CARD using the sketch below. Your project doesn’t need to follow the sketch exactly, but it should be apparent that you used it as inspiration. Feel free to turn it on it’s side or move elements to fit what you are doing. In addition to using the sketch, we also want you to incorporate STAMPING and BUTTONS (of course!).  Project must be newly created for this challenge and must include at least 2 different cuts from any Cricut cartridge to qualify." 


 This challenge was perfect for scrapping a page of my newest nephew, he is "cute as a button".


Cricut cartridges used were Mother's Day - Border, 1 1/2"; George Basic Shapes - Circle, 3/4" and Nursery Rhymes - "Chase", 1 1/2".  I used Design Studio to weld the letters together for the title, and stretch the border so it measured 1 1/2" x 8" as well as shrink the circles to 3/4".  I cut the border in half to make the upper and lower border.

The white background paper was embossed using my Cuttlebug and the Fiskar baby plate.  The tiny feet and the white border around the buttons (says "Cute as a button") was stamped with VersaMark ink then chalked with glimmer chalks.

Friday, January 14, 2011

Cricut Circle January Magazine Challenge

This month's challenge was to find something from the thrift store to repurpose with your imagination and your Cricut Machine. Use at least four Cricut cuts in the design and upload before and after shots of the project.

I found a denim bag/purse for a $1 that I thought would be great for toting my supplies to crops.  This has lots of great pockets perfect for all the supplies I'll need for a project and a place for my Cricut cartridges with handbooks and overlays.


I wanted to try heat set vinyl but I could only find it on-line plus I didn't care too much for the limited color selection.  I love paper and wanted to be able to use something with a pattern to it.  Checking out the local Michael's, I came across Wilton's T-shirt transfers for dark fabric.  Perfect solution.


I cut my design from the following carts:  Doodlecharms - Heart 3 1/2"; Potpourri Basket - Bug head with shadow 1 1/2" and 3 1/2"; Birthday Bash - "I" with shadow 3 1/2"; Home Decor - "create" 1 1/2"; and Just Because Cards - "you are my" 1 1/2" using real dial size.  Using Design Studio I welded the 1 1/2" bug head shadow to the "create", I also hide the "you" and "are" keeping the "my".

Cuts were assembled and placed on a dark background paper to match the denim bag.

Following the transfer directions I printed the image on the transfer paper but I probably could have just copied it.  I trimmed around the cuts removing the unwanted background.  Again following the transfer directions, I applied the images to the bag.


I'm very happy with how it turned out.  Love that you can use patterned paper and my Cricut to create great designs for fabric.  I'll definitely be using the T-shirt transfers more often.

Tuesday, January 11, 2011

Cricut Circle Blog Weekly Challenge #15: Feeling Frosty

Brrrr! Winter is in full swing over many parts of the country . . . but even if it is warm where you are, you can use Winter-inspired elements to fuel your creative juices on your next Cricut project. We challenge you to incorporate white paint, metal, and a snowflake cut on your project this week.

I chose to do a layout of a Christmas in Tahoe from a couple of years ago, there was snow so it was a little frosty feeling.


Paper is from Debbie Mumm's Harvest and Holiday 2009 paper pack.  The pine tree cuts are from the Camping Out cartridge, cut at 4".  White paint was applied to the branches for a snow effect.  Snowflakes were left overs from a prior project, I don't remember what carts they are from.  The metal element is a brass Christmas ornament I found at a thrift store several years ago.  I liked it because it had cabins on it, figured it would come in handy when we spent Christmas at the cabins.

HSN Card Contest

On January 20th, 2011, Provo Craft will be announcing a brand NEW exciting product on HSN! Anna Griffin will also be announcing a new product on that same day. We can’t tell you what it is yet, but would you like the opportunity to win both?!  Here is what you need to do . . .

Create a card using at least one Anna Griffin product (it can be anything!) and one or more of the following cartridges. You may use other cartridges on the card, but the majority of the design needs to represent one or more of the following cartridges:
  • Don Juan Cartridge
  • Winter Lace Seasonal Cartridge
  • Wall Decor & More
Winners will receive BOTH the NEW Provo Craft product, as well as the NEW Anna Griffin product.

Here is my entry:


Anna Griffin products used were the following papers from her Valentina line:  AG1467 - Glitter; AG1457 - Flock; AG1465 - Pink print and one from my paper stash AG215 - Solid pink

Cricut Cartridges and cuts:  Wall Decor & More - Heart, 3 1/2"; Winter Lace - Snowflake #1, 2" ; Don Juan - Rectangle, 5 1/4 x 6"

I created the lace in Design Studio by welding four snowflakes together.  On the inside of the card I welded the rectangle between two sets of welded snowflakes.

Looking forward to the big reveal on the 20th!

Thursday, January 6, 2011

Cricut Circle Blog Weekly Challenge #14: Getting Into Shape

According to polls, “getting in shape” is among the Top Ten Resolutions people make each New Year’s Eve. Let’s do it! Let’s start the New Year off right by getting in shape . . . a shape other than a rectangle. We challenge you to create a project in a shape other than a square or rectangle. Your project must also include a number somewhere and bling of some kind (to go along with this week’s theme of “Blinging in the New Year”!

My entry for the challenge:


 I created a crown shaped card using the Birthday Bash card feature.  All cuts came from this cartridge.  Using Design Studio I laid out my cuts on the mat.  The crown started out at 5" so that it would fit on the mat lengthwise, I then stretched it so it was 5 1/2" tall.  The pink layer was left at 5" as it still fit the cut.  "Royal Wishes" and the "4" were cut at 3".  Inside the card is "Happy Birthday", this was cut at 2 1/2".   Lots of princess bling with this card.  The "4" was painted with gold Perfect Pearls.  The pink layer and "Royal Wishes" was given Stickle sparkle.  And of course a crown requires lots of jewels.